HDR is a photographic technique that you may have seen several of examples of, but perhaps you don’t know what they are or how they’re done. So the aim of this article is to introduce you to the world of HDR photography.
The letters HDR stand for High Dynamic Range, in photography dynamic range is roughly the area between having the highlights burnt out and the shadows to dark to see anything in. When it comes to recording a scene a camera has quite a limited dynamic range compared to our eyes, which is why so often our photographs don’t quite capture the scene as we recall seeing it. To do that we need to expand the dynamic range of our photographs, this is done by taking a series of photographs with different shutter speeds. Normally, HDR is done with three shots, one over exposed, one under exposed and one correctly exposed, but five or more shots can be used.
Take a look at these three photos.
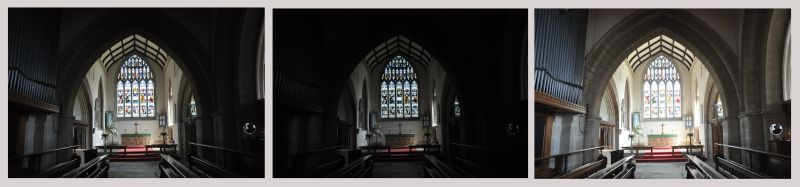
The left photo is the normal ‘correct’ exposure. The stained glass windows just a bit burnt out and there is very little detail in the choir stall. The middle photo has much better detail in the window, but none at all in the choir stall. In the right hand photo you can see the detail in the organ pipes, the choir stall and the stonework of the archway, but the window is almost burnt out.
All the shots are then combined into one image using image combining software, the most popular being Photomatix but there are other programs that can do the merging, some versions of Photoshop can also be used to create HDR images, there’s also some mobile phone apps that do it, but generally a specialist program like Photomatix will give you more control over the finished image.
So how do you get your three, or more, photos? One method is to mount the camera on a tripod take a meter reading and take the first shot, then change the shutter speed for a slower one and take the second shot then select a faster shutter speed and take the third shot etc. This method isn’t very convenient and in many situations you either wouldn’t be allowed, or won’t be able, to set up a tripod. However there is an easier way. Most DSLRs have an auto bracketing mode which once enabled will take photos in batches of three, or more depending on the camera, one being the correct exposure the other two being the under and over exposed photos. Depending on your the camera the degree of change in the exposure value can be altered to your requirement. Once the camera is in bracket mode it’s simply a matter of holding the camera very, very steady and pressing the shutter release three times, or using the continuous shooting feature if the camera has one. It’s a good idea to take several groups of shots that way you can choose the best set to process into an HDR image. I take three shots because that’s all that my camera can do automatically, more would mean using to a tripod.
The photo below is the result of merging the three photos in Photomatix, as you can see there is good detail in the stained glass window and all the way back to the organ and choir stalls. (there are, of course, no prizes for spotting the photographer in the mirror! I saw the mirror, but didn’t realise until I got home that I was in it!!)
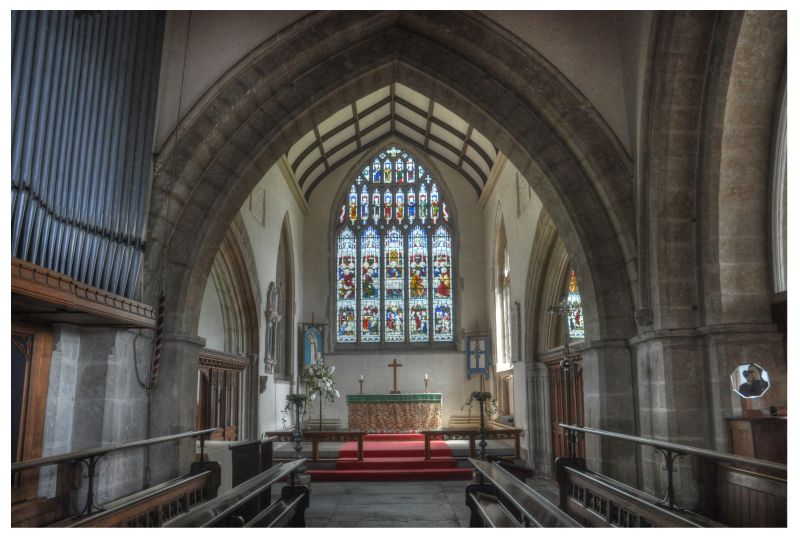
So how was that image created.
The first step is to fire up the photo merge program, I’m using Photomatix, but there are other options. Then you import the thee photos, in photomatix it’s a nice easy drag’n’drop procedure.
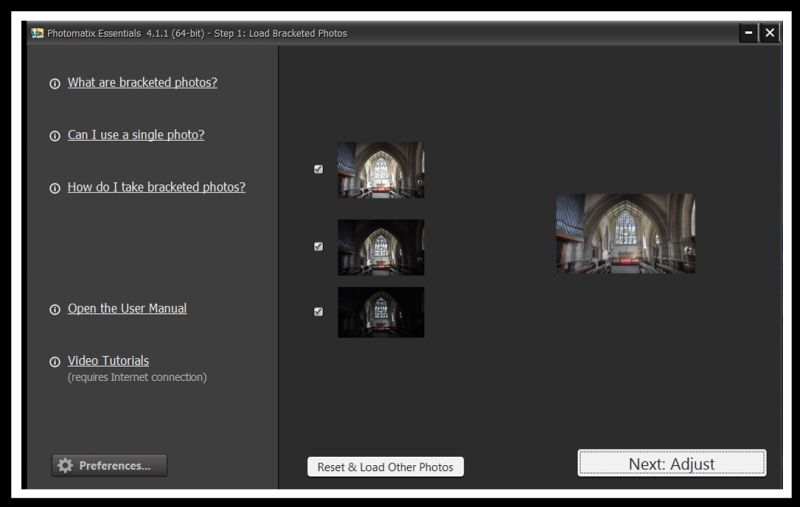
Click on “Adjust” and this is what you’re presented with.
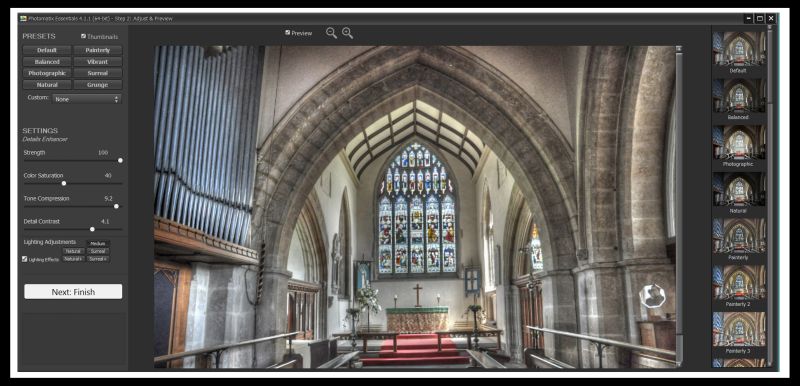
In the top left are a number of presets, try them all, and find the one you like best. Also on the left are the settings sliders, if none of the presets give you a result you like you can move the four sliders about to fine tune the look of the image. On the right hand side there are a number of preset thumbnails which if you click on them will apply that style to your image.
In the image below all the settings sliders have been set to 100%
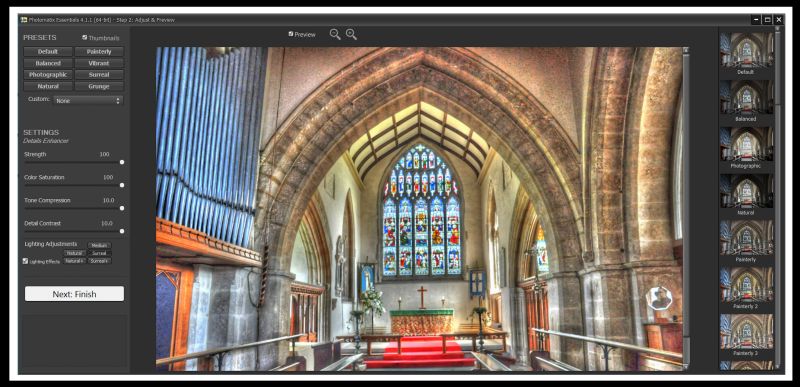
A word of caution at this point, try not to get carried away with the settings sliders. HDR is a great process for creating artistic images, but extreme HDR images don’t always suit every subject, and, as the old adage goes ‘less is often more’. When you’ve got your image looking the way you want click on ‘Finish’ and save your masterpiece.
When taking your shots there are a couple of things to remember when shooting for HDR. Firstly, all the photos have to be identical there can’t be any changes in them so people walking through the shot will cause ghosts, although Photomatix can remove some of the ghosts, so HDR is not a good technique for action photos. Second, when taking your bracketed shots remember to change the shutter speed not the aperture as that will change the depth of field and the three photos won’t be exactly the same.
One final point. Remember to switch off the bracket mode once you’ve finished shooting your HDR sets otherwise you’re going to be very disappointed with two out of every three single shots you take later on!
(yes, I speak from experience on that!!)
HDR is a bit of a controversial technique, some photographers dislike it immensely and the rules of some photographic competitions specifically exclude HDR entries as do some photo websites. I’ve had submissions to photo gallery websites rejected because they were HDR and not normal photos. Of course, if you use your HDR software with a very light touch you can often create an image that is almost indistinguishable from a normal photo, doing this would probably be OK for gallery websites, but it’s not a good idea to deliberately break the rules in competitions.
Used carefully HDR can be a great tool for creative photography and once you’ve started with HDR each time you’re out taking photos you’ll find yourself thinking, “that would look great in HDR”. So welcome to the world of the HDR photographer.
I hope you’ve found this article interesting and informative so I’ll end with some example HDR photos of my own.
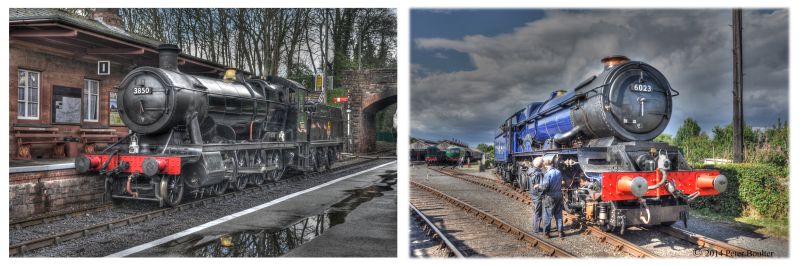
With these two my aim was to create photos that were almost conventional record shots, but to add a bit of impact to the subject.
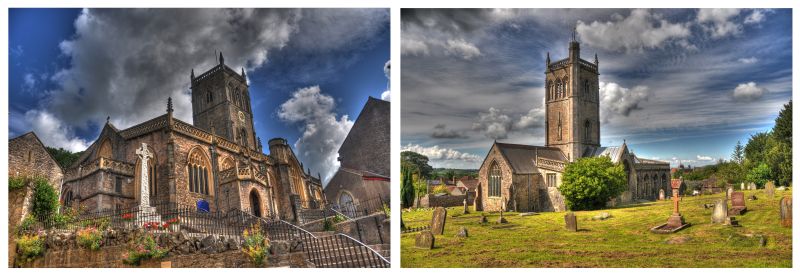
With these two the idea was to create a bit of a dramatic look rather than a true record of the churches concerned.
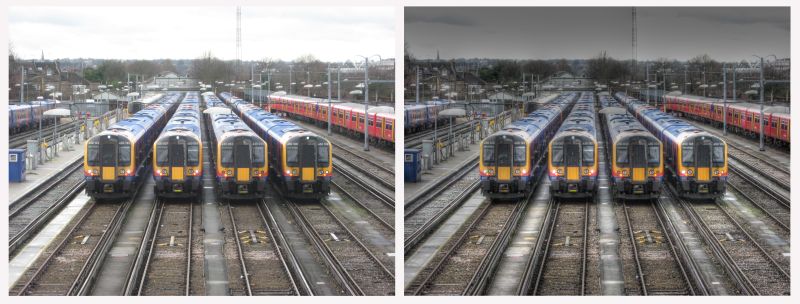
Finally, an example of an HDR looking photo created using only one photograph to demonstrate that even a single photo can be made into something that looks more interesting than a straight forward photo. OK, so I know that not everyone is going to find a picture of four class 450 EMUs in the yard at Clapham Junction interesting. The photo on the left is the original the one on the right has been processed in photomatix to look like an HDR image, but obviously you don’t gain the benefits of a true HDR image.